Wednesday, June 27, 2012

The On30 Bachman Baggage Combine Modification

The conversion of this Baggage Combine into a working member of the BR Railway roster involved pulling it apart and adding interior details, improving the lighting with LEDS and anti-flicker kit from DCConcepts, canvasing the roof and adding a new paint job. The article from the Sept 2011 Model Railway Hobbyist Online Magazine section "The Lite and Narrow" proved very helpful. Visit link to download.
 So here goes on documenting my effort.

Pulling the Combine apart required some prising apart of clip lugs and undoing bogie and floor screws. The roof came off first giving access to floor screws.
The position of the interior light.
Removing the window took some effort as they are fastened with some good contact adhesive. I resorted to using the Dremel and cutting blade and then the mult-tool to cleanup the glue deposits and broken window tabs.
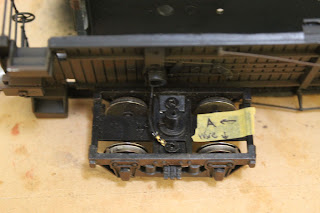
The wire for the lighting is screwed to the bogie.
The front bogie.
Weathering of the Body: I used an undercoat of dark brown spray paint. I then let that dry over night. The next evening I sprayed on a coat of TreSeme Extrahold hairspray and let dry for 10 mins. Then I brust on a thinned coat of mixed flat red and red brown tamiya paints and dryed with a hairdryer, Then, suing a stiff hogs bristle brush, working in downward strokes I wore away section of the thinned mixture or remoed more with Isosopropyl Alcohol. This gave a more weathered, peeling paint look. Then I finished of with various shade of weathering powder after a shot of Testors Dullcoat.
The overall look with the frame having some weathering.
Painting up figures and the interior seats.


Some of the passengers after painting up. They are a little oversize to fit in the combine apartment, so some removal of body parts was needed.

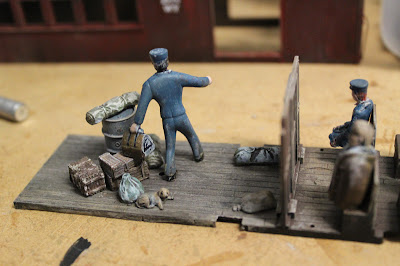
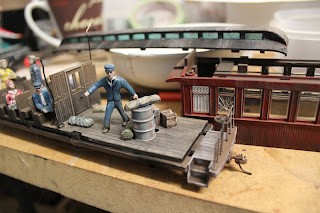
Adding details like luggage into the baggage compartment. Items are from the Tamiya 1/48 army baggage kit for army tanks. Good bed rolls and bags. Also a puppy.


You can see on the window that I have added cracks for extra interest and painted the toilet widow white.

The roof was covered with tissue paper applied with diluted PVA. Then weathered with washed of acrylic paint and weatherd black paints and some greyish weathering powders.
Another shot.


 I was pleased with how the combine came up. The LED non flicker set from DCC concepts really made an excellent improvement to the lighting. I used 2 LEDs soldered to the PCB strip and a 1k resister. 


Monday, June 25, 2012

The Fuel Depot Tanks
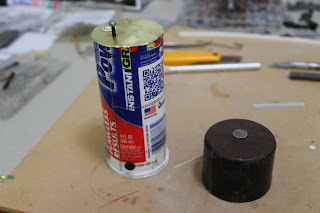
The fuel depot tanks where constructed from a Tamiya Spray Can lid and a caulking glue tube section.  Comments below photos.

I built up a slightly peaked roof using no more gaps on the small tank. The sides of the tanks where scribed and then Micro Mark rivet decals applied. The rivet decals work a real treat.
 
A brass roof was added to the larger tank and small details like breathers and openings.

The tanks primed.


The rivet decal sheets and testing basic placement.

Building the wooden framework for the smaller tank. Bolt details added.


More placement tests and the weathering begins.

Hose detail added to the tanker. Hose made from 1.8mm solder and painted with matt khaki and dark greens. Also Oil black added on deck of flat car.


Esso decal (created on Decal paper using laser printer) and white band added to the large tank. Some lighter weathering.

Tuesday, June 12, 2012

 Storm Damage

Heres a few shots of the storm damage on Sunday 10th June 2012 into the entry to our residential area. Amazing how the big trees get snapped or up rooted. Poor golfers, the course is out of action for 3 days.


And now there's another front on its way up the coast packing winds of 60 knots (110kmh to 125 kmh) or more. See what images the morn brings.

Thursday, June 7, 2012

 Some of the mini scenes....

 Here are a few shots of some of the characters on the module. Of course...they are all busily at work.

Charles hard at work repairing the walk way down to the spring fed water hole that the locos use to fill up their water tender with a hose.

The artists wife making sure the hired hand spreads the gravel in the right places.
Artist Tom 'Brushes' Borgland peruses his latest art piece on the verandah of his studio overlooking the Warrumbullen Valley.

W.R. Edwards takes stock of the latest delivery of oil drums. His son Will Jnr does the lifting and moving work.

Old William Edwards Snr waits for the Shay to clear the loop with the tanker delivery.

Number 4 sits quietly waiting to place the tanker at the Esso depot.

Will Jnrs brother Ronny heads out of the workshop after giving his Harley a tune, under the deft guidance of long time mechanic Danny Stedan.

Remember to check out the video in the last Post.

Tuesday, June 5, 2012

Exhibition weekend.

The 95% completed module at the Exhibition.

The Exhibition has come and gone. Very successful weekend. Over 22 000 people came through the gates. Here is a sneak peek video of how it looked and ran. It's better to view this at full screen resolution via the Youtube link.


I will now endeavor to post up all the construction details and photos for those who are interested over the next weeks or so. So visit regularly to see how it all came together. Can't wait to get it more than 95% complete by adding in all those unfinished details and replanting the trees after the transport back from the exhibition. And a few more stills....
Looking down through the trees to the artists studio and residence.

The passenger combine rolling on through.


The crowd taking in the scene...the kids and adults reactions were very favorable.


The Garages workshop being put to good use and the pooches being entertained.


The late afternoon glow.